Out of the box, Unraid has no root password and SSH is disabled. That is fine for a first boot, but before you start storing data or connecting services, you need to lock down access. This guide covers securing the root account, setting up key-based SSH so you can manage the server from your terminal, and creating a dedicated user for share access.
Executive Summary#
We will set a root password, enable SSH, generate an SSH key pair on your client machine, add the public key to Unraid, connect via SSH, and create an SMB user for network share access. By the end you will have a secured server you can manage from the terminal without ever needing a password prompt.
Prerequisites#
| Component | Requirement |
|---|---|
| Unraid Server | A running server with a started and protected array |
| Client Machine | A Linux machine on the same local network |
Assumptions: This guide follows on from Managing Drives and Storage Pools in Unraid. SSH key generation commands shown here are run from a Linux client (Pop!_OS). The process is similar on macOS. Windows users can use WSL or PowerShell.
Implementation#
Step 1: Understand Unraid’s User Model#
Before making any changes, it helps to understand how Unraid handles users.
Unraid has exactly one administrative account: root. This is the only account that can log into the web UI or connect via SSH. You cannot create additional admin accounts.
Users created through the Users tab are SMB-only accounts. They exist solely to control who can access network shares. They cannot log into the web UI, cannot SSH into the server, and have no system-level privileges.
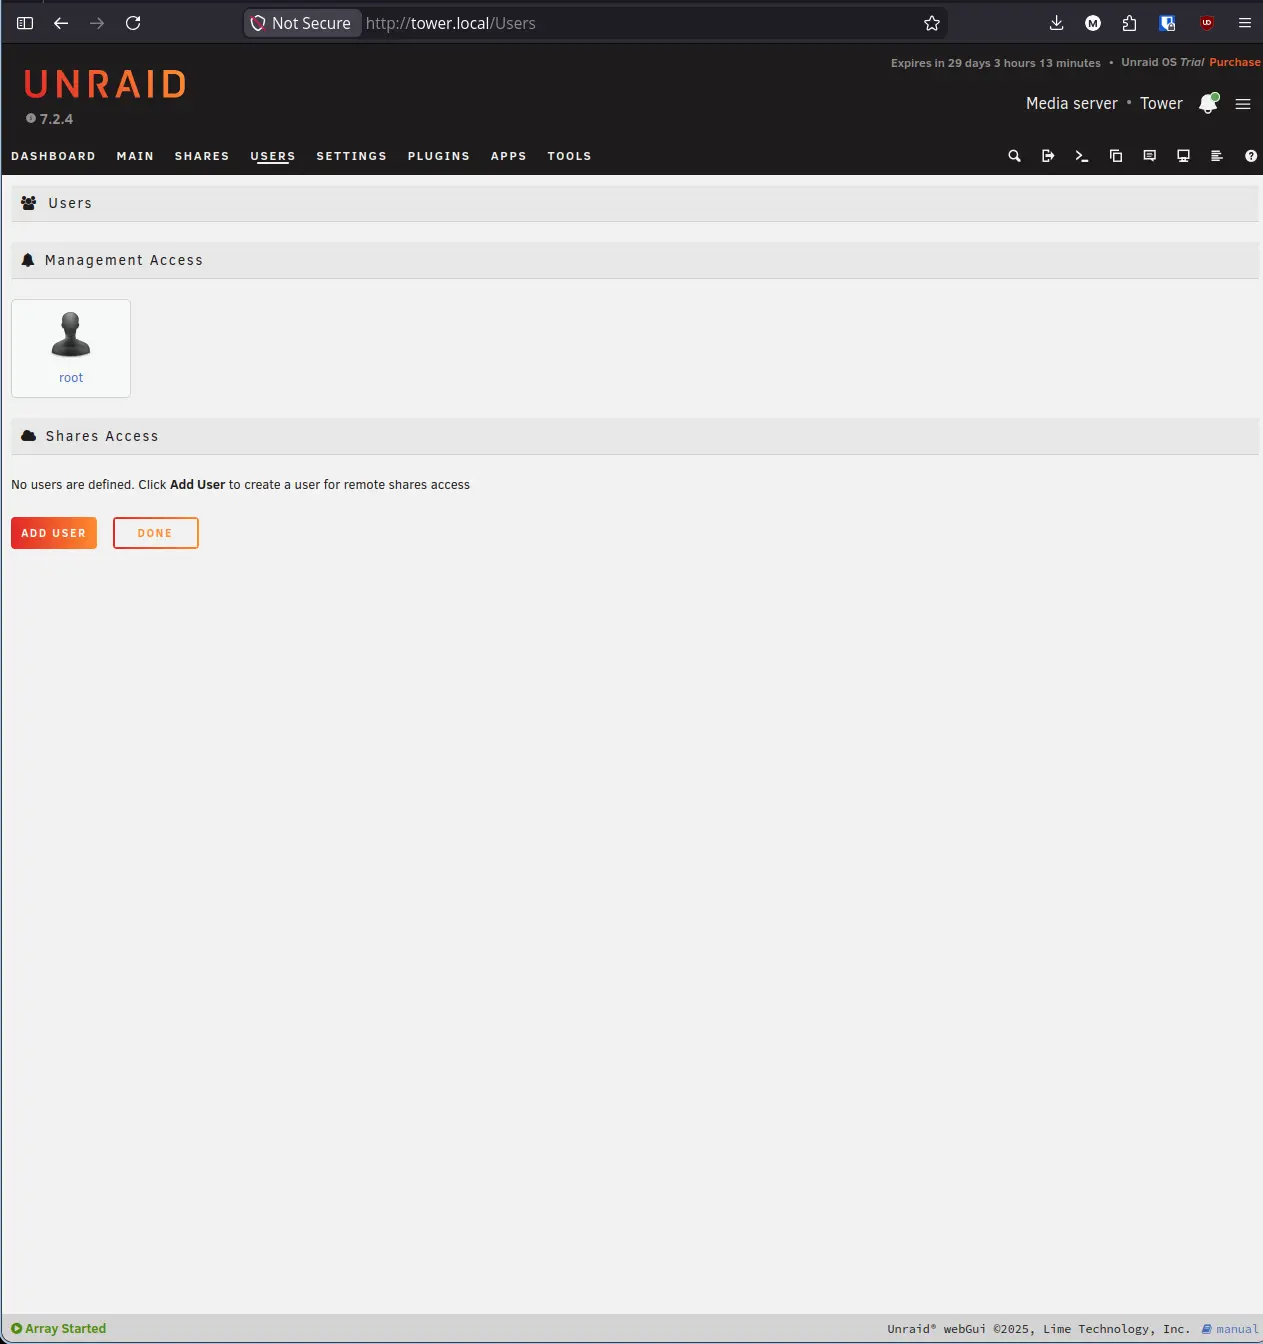
Step 2: Secure the Root Account#
The root account has no password by default. Set one before doing anything else.
- Click the Users tab in the top navigation bar.
- Click on root under Management Access.
- Enter a strong password in the Password field and confirm it.
- Click Change.
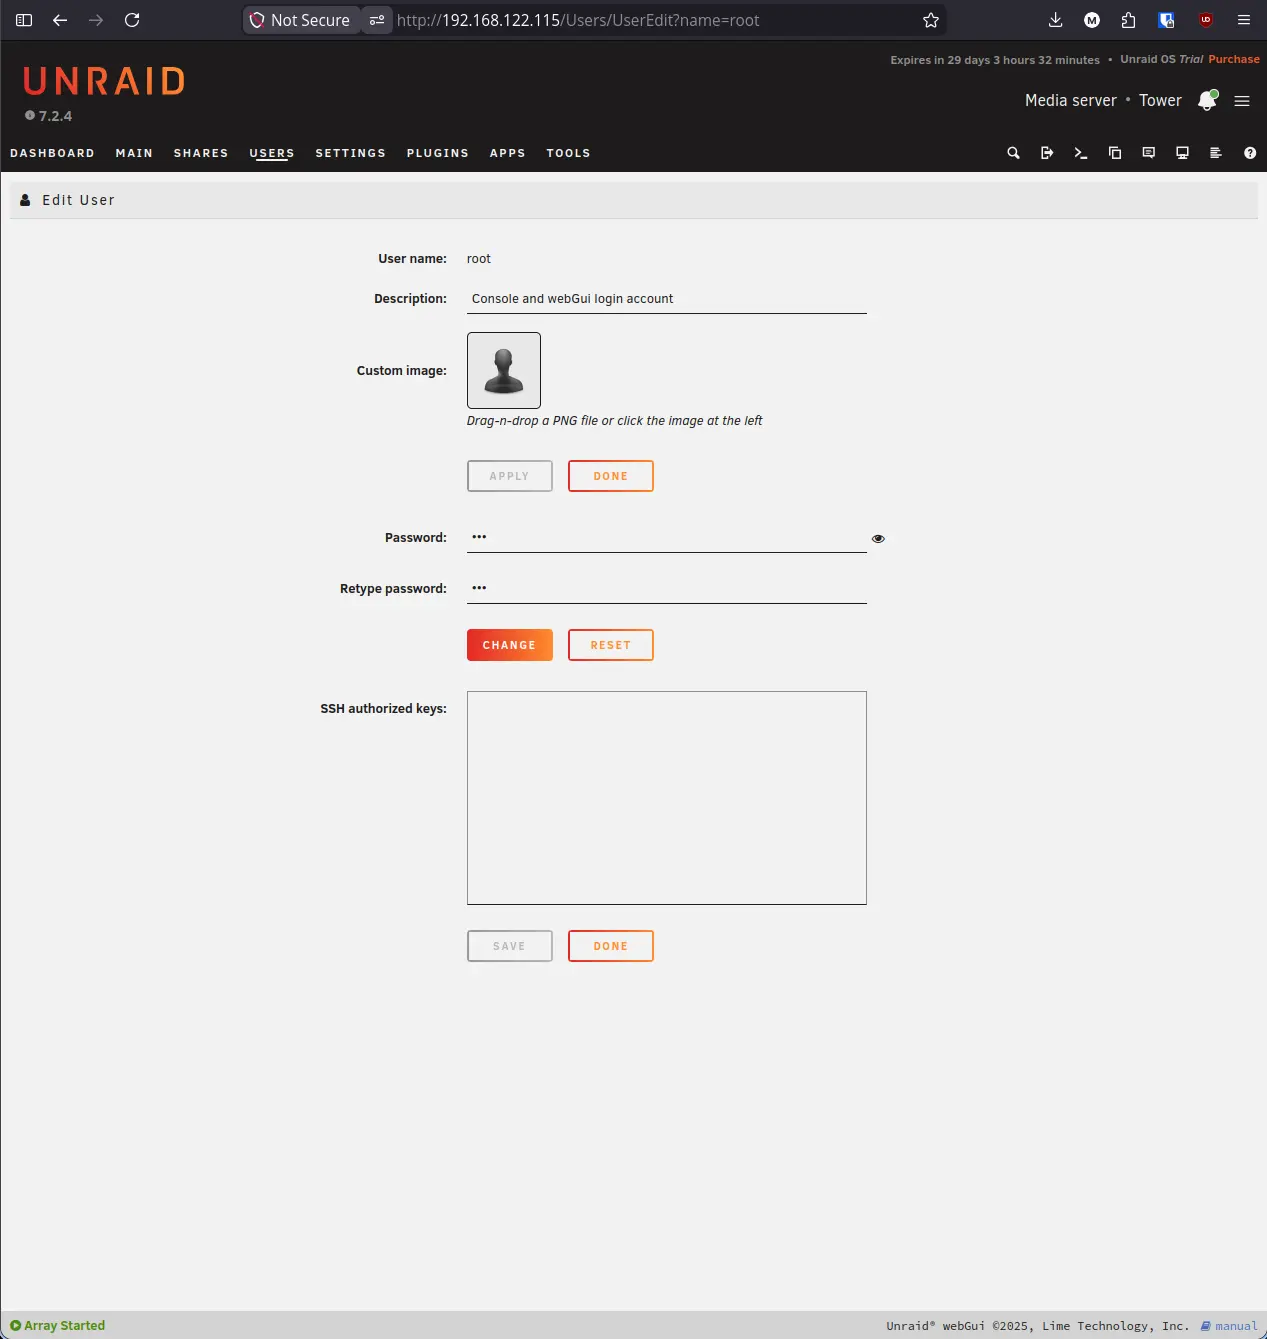
Note: This password protects the Unraid web UI. Anyone on your network who can reach the server’s IP address will be prompted for this password before they can access anything.
Step 3: Enable SSH#
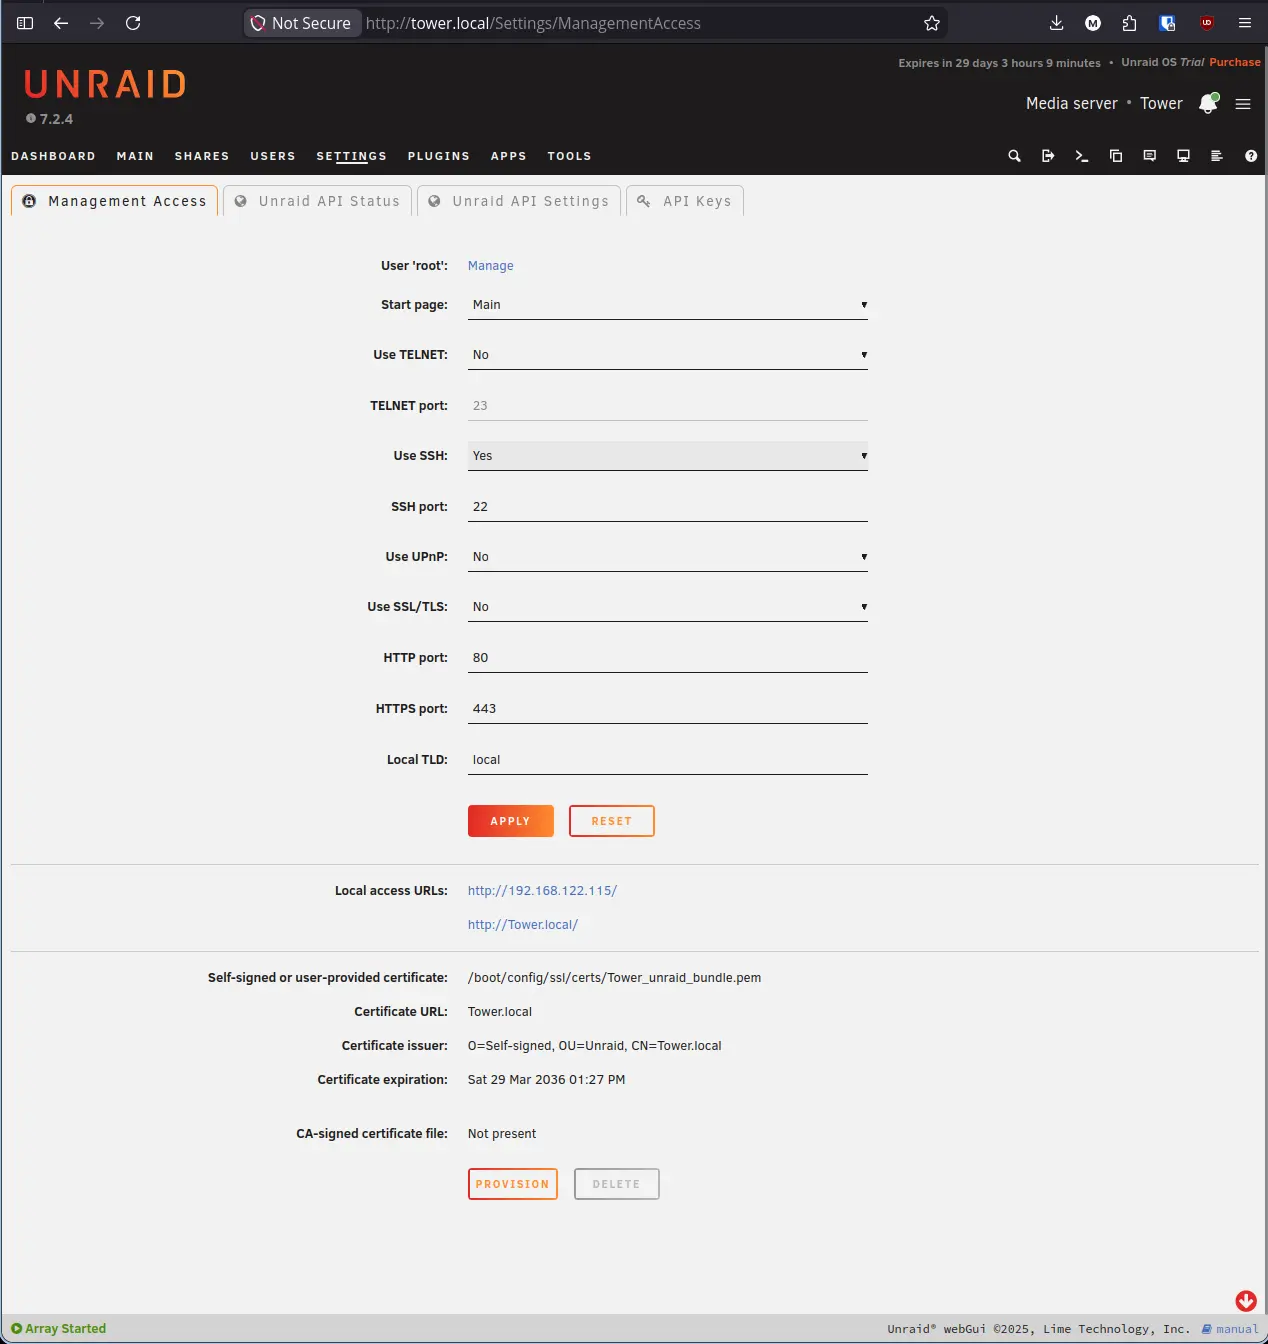
SSH is disabled by default in Unraid. You need to enable it before you can connect from the terminal.
- Click Settings in the top navigation bar.
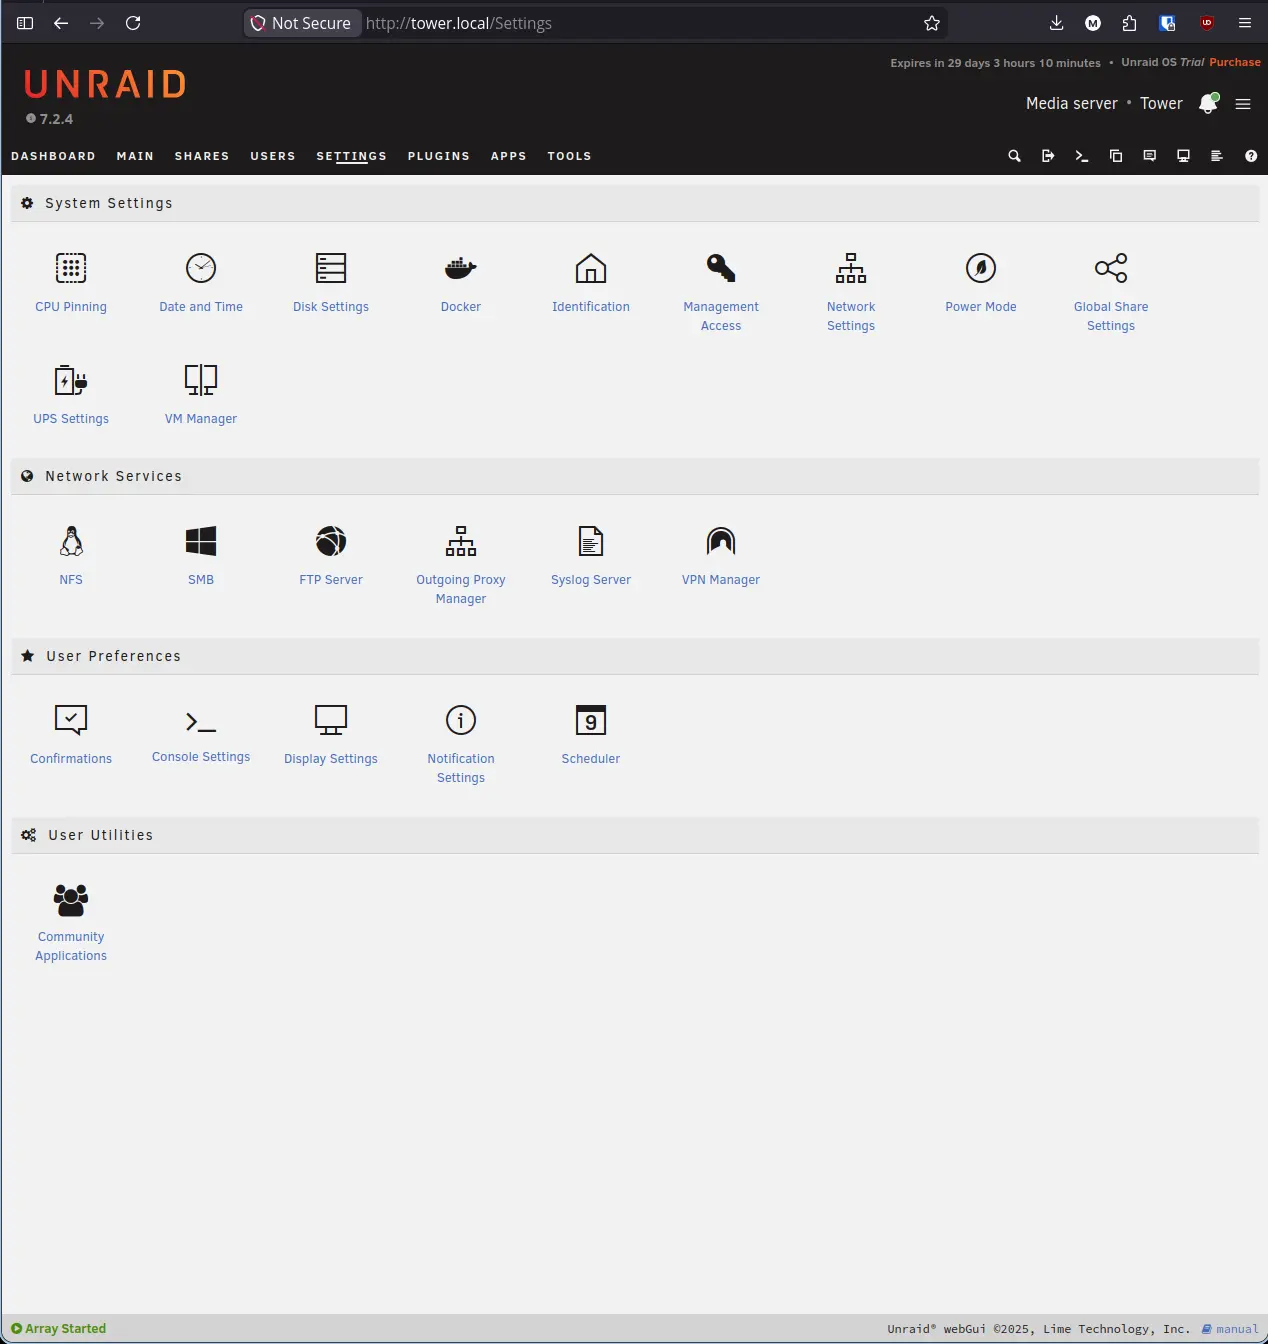
- Click Management Access under System Settings.
- Find the Use SSH dropdown and select Yes.
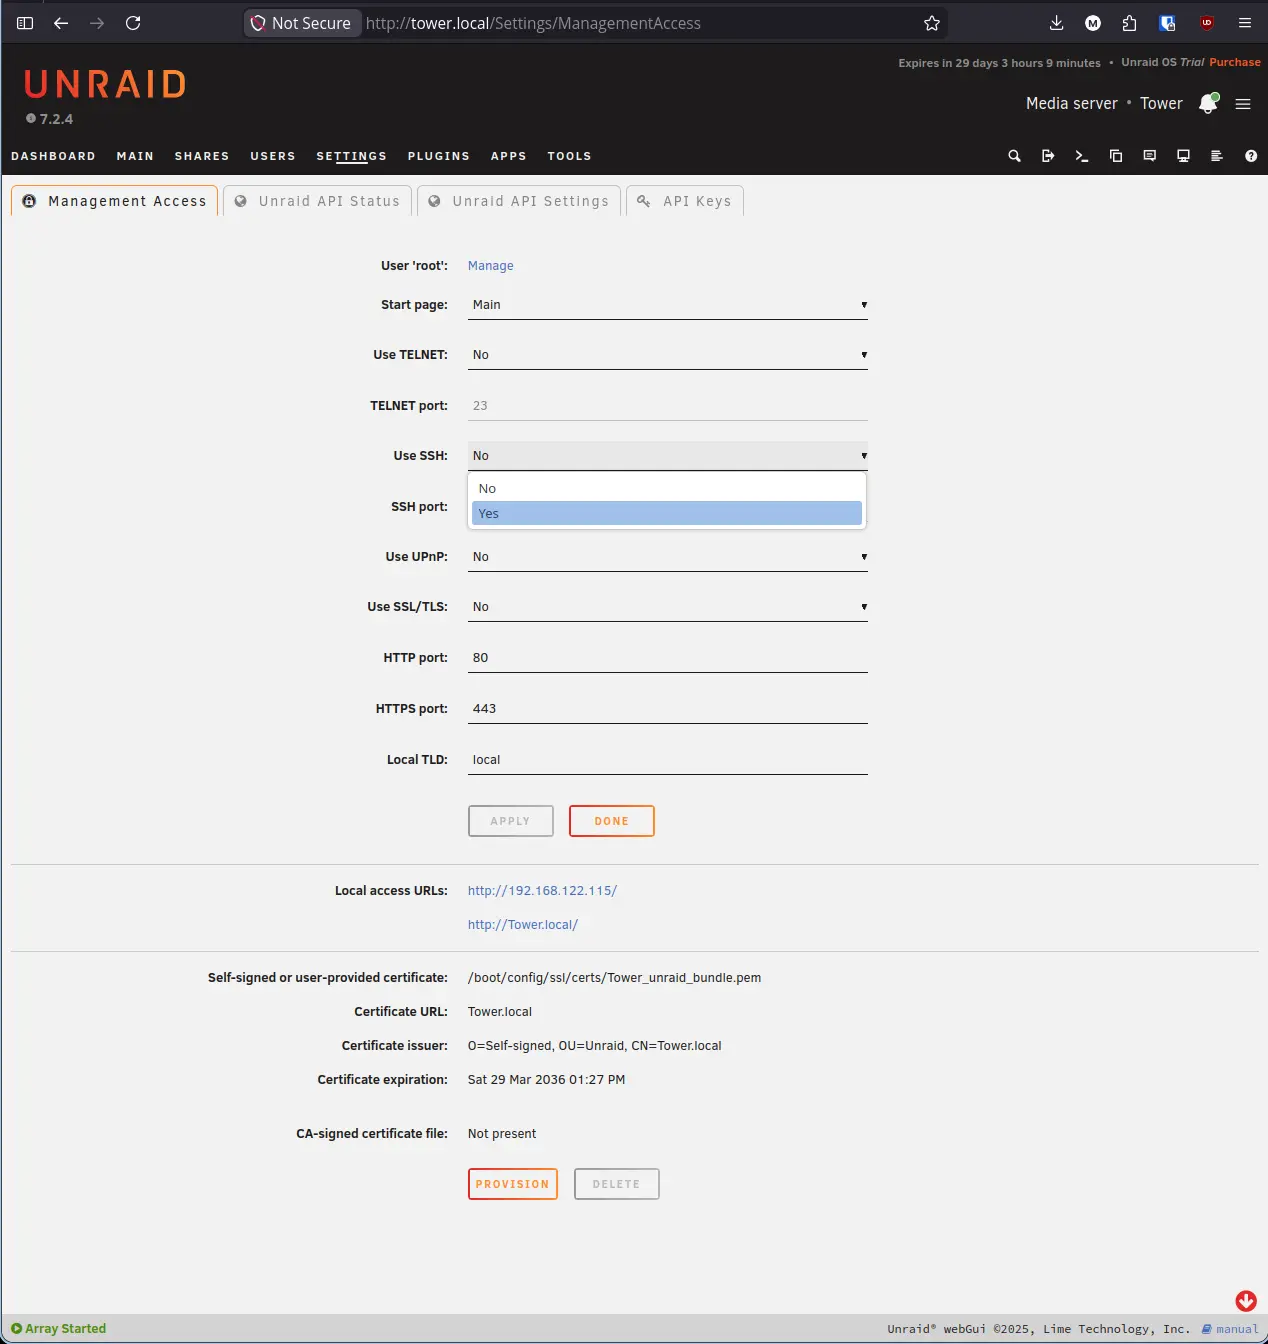
- Click Apply.
Step 4: Generate an SSH Key Pair#
SSH keys are a more secure alternative to passwords. Instead of typing a password every time you connect, your client machine proves its identity using a cryptographic key pair. The private key stays on your machine and never leaves it. The public key gets added to Unraid and acts as a lock that only your private key can open.
On your client machine, open a terminal and run:
ssh-keygen -t ed25519 -C "your-username@your-computer-name"Replace your-username@your-computer-name with something that identifies you and your machine, for example john@laptop or mhofmann@hofiverse. This is just a label attached to the key to help you recognize it later. It does not affect how the key works.
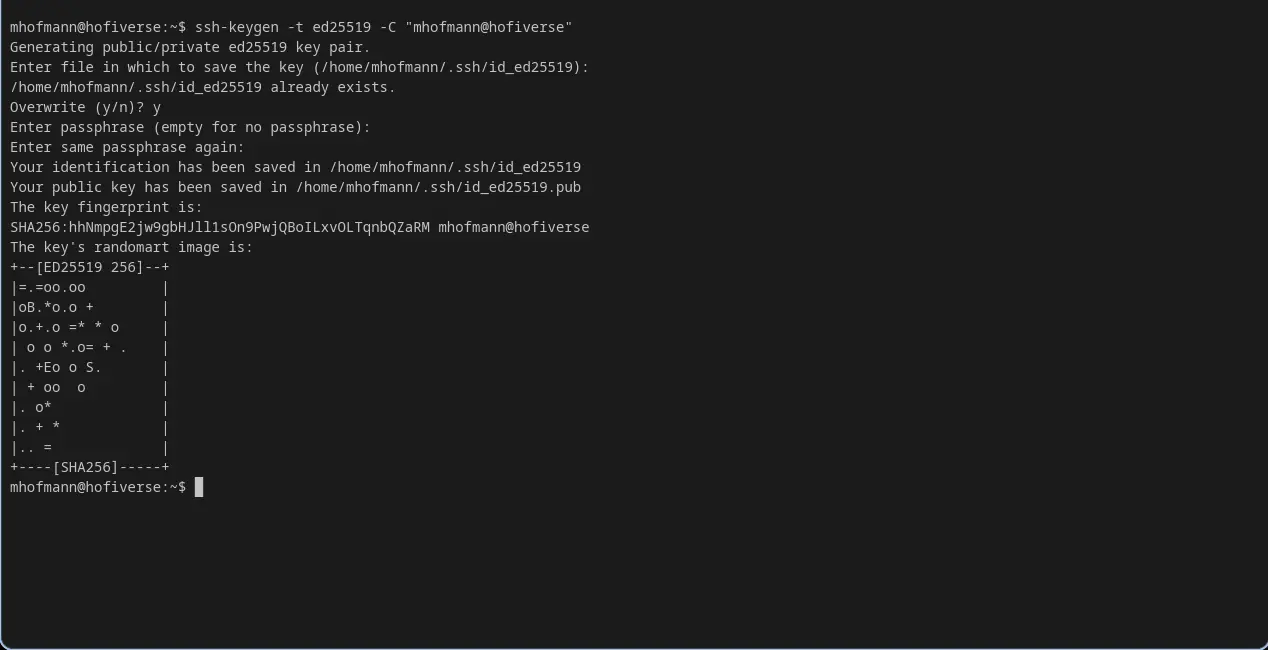
y to regenerate. The randomart image is a visual fingerprint of the key, useful for verifying the key visually.
A few things to note from the output:
- Private key is saved to
~/.ssh/id_ed25519. Never share this file with anyone. - Public key is saved to
~/.ssh/id_ed25519.pub. This is what you give to servers. - Passphrase: You can optionally set a passphrase when prompted. If you do, you will be asked for it each time you use the key. A passphrase means that even if someone gets hold of your private key file, they still cannot use it without knowing the passphrase. For a home lab, leaving it empty is common but adding one is the more secure choice.
Step 5: Add the Public Key to Unraid#
Now that you have a key pair, copy the public key and add it to the root account in Unraid.
On your client machine, print the public key:
cat ~/.ssh/id_ed25519.pub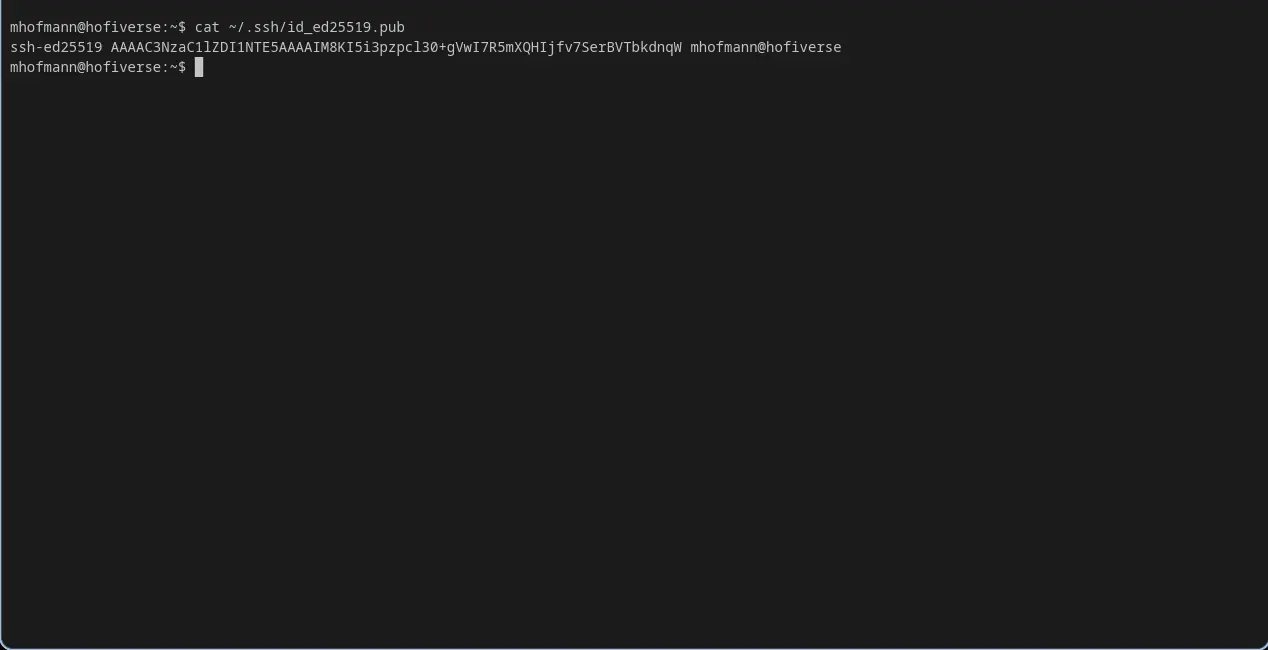
Copy the entire output. Then:
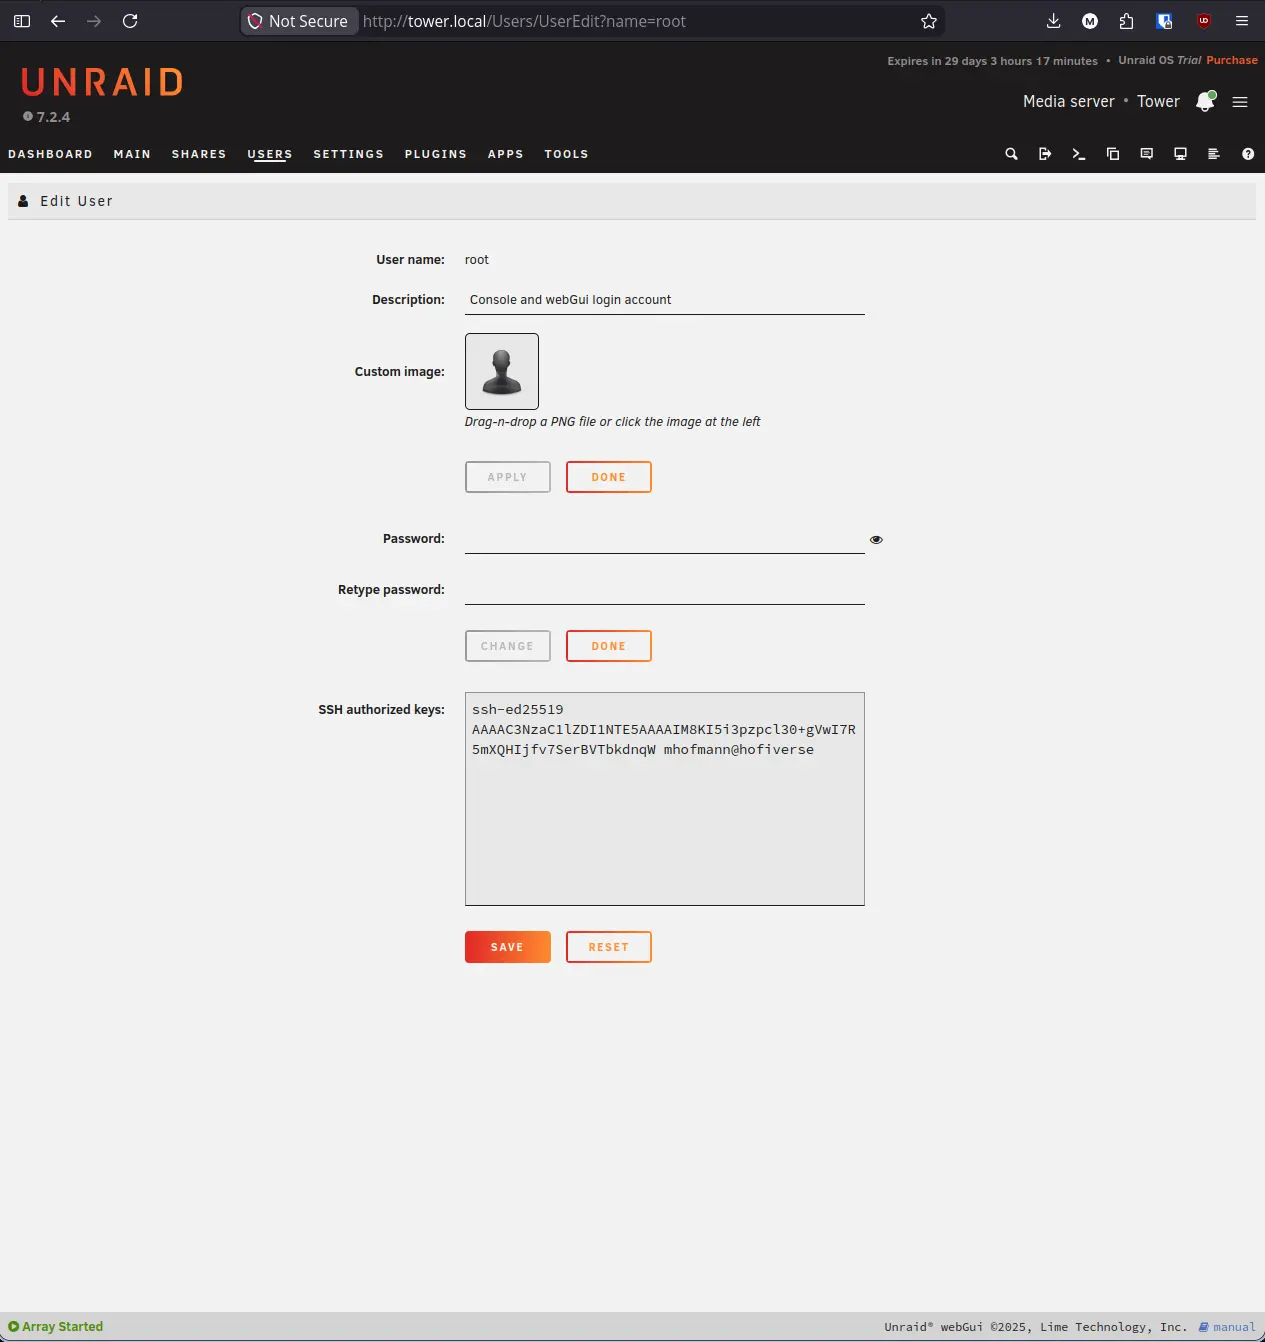
- In the Unraid web UI, click Users and click on root.
- Scroll down to the SSH authorized keys field.
- Paste the public key into the field.
- Click Save.
Step 6: Connect via SSH#
With the key added, test the connection from your client machine:
ssh root@YOUR_UNRAID_IP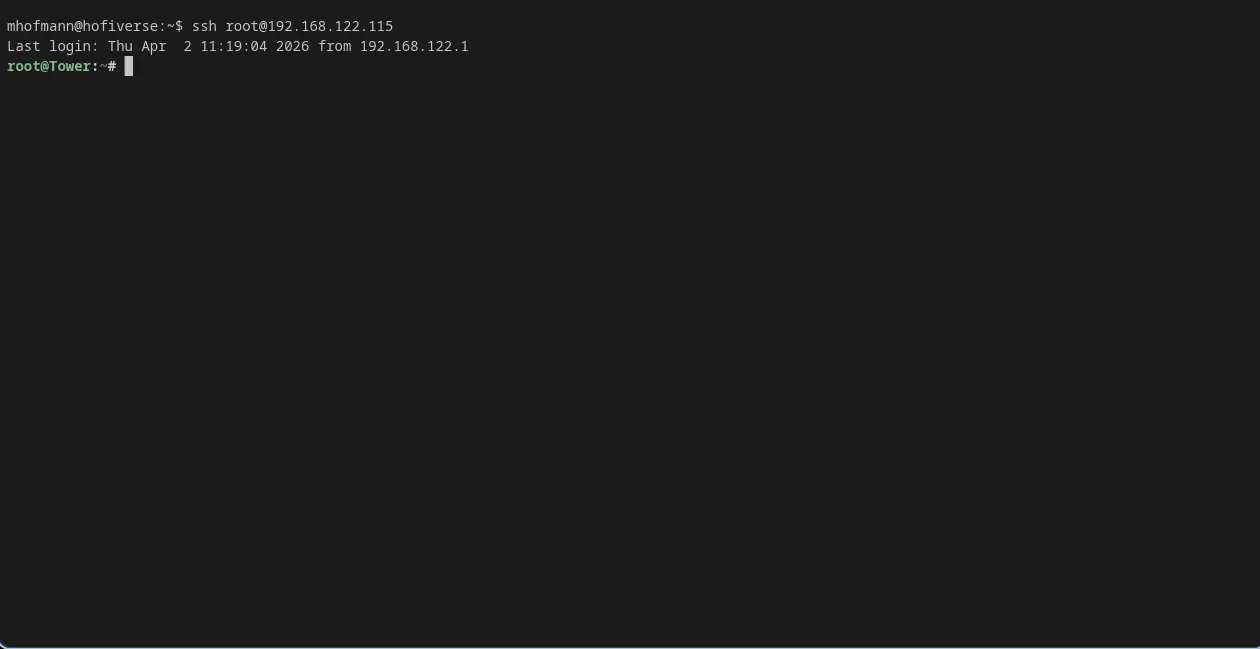
root@Tower confirming you are now in a session on the Unraid server. No password was required because the key handled authentication.
Note: The name
Towerin the prompt is your Unraid server’s hostname, not your local machine. Unraid usesToweras the default hostname. If you renamed your server during setup, you will see that name instead. On your first connection to a new server, SSH will ask you to verify the server’s fingerprint. Typeyesto accept and continue. The fingerprint is saved so you will not be asked again.
Step 7: Basic Server Management from the Terminal#
With SSH access established, here are some useful commands for day-to-day server management:
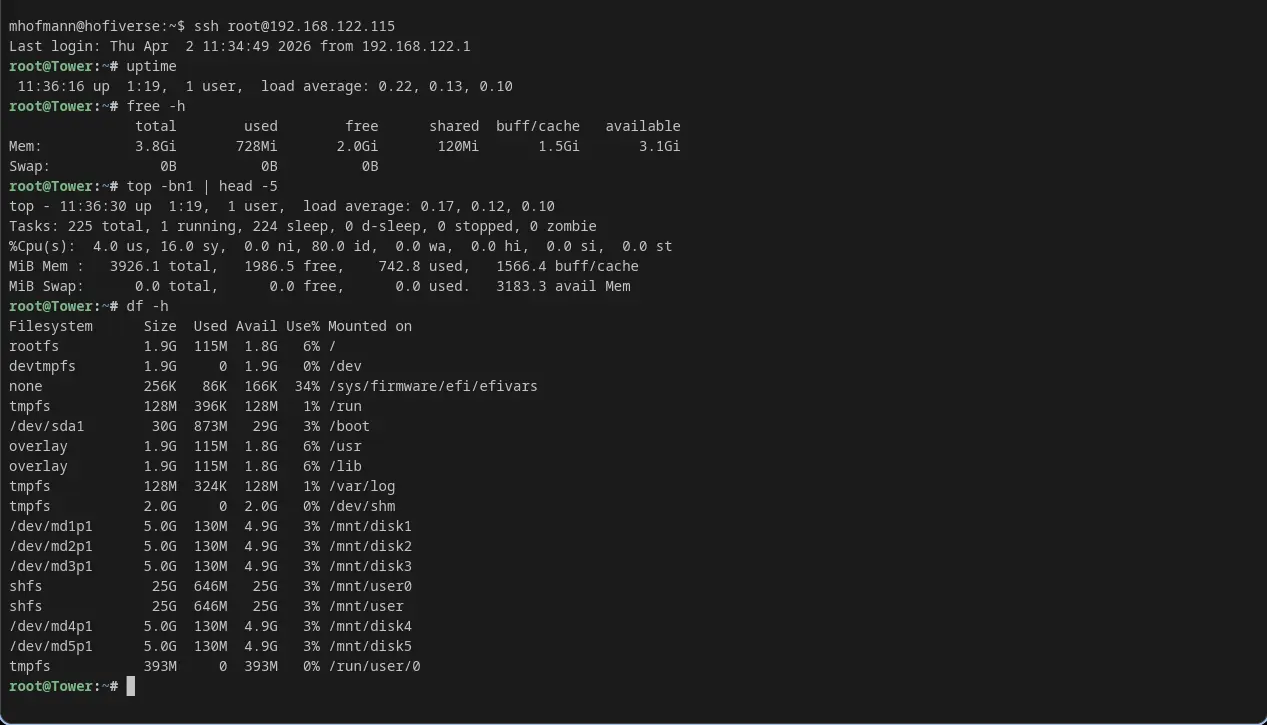
| Command | What It Shows |
|---|---|
uptime | How long the server has been running and current load average |
free -h | RAM usage in a human-readable format |
top -bn1 | head -5 | A snapshot of CPU usage and running processes |
df -h | Disk usage across all mounted filesystems including array drives |
ls /mnt/user | All shares currently accessible on the array |
tail -f /var/log/syslog | Live system log stream, useful for watching events as they happen |
The following commands are also useful for day-to-day management and are not shown in the screenshot above:
| Command | What It Does |
|---|---|
cat /etc/unraid-version | Shows the currently installed version of Unraid |
mdcmd status | Shows the full array status including disk states and sync progress |
smartctl -a /dev/sdb | Full SMART health report for a specific drive, replace sdb with your drive |
dmesg | tail -20 | Recent kernel messages, useful for spotting hardware or driver issues |
reboot | Cleanly reboots the server |
poweroff | Cleanly shuts the server down |
Step 8: Create an SMB User#
Root cannot access SMB shares. To connect to your Unraid shares from another device, you need at least one SMB user.
- Click the Users tab and click Add User.
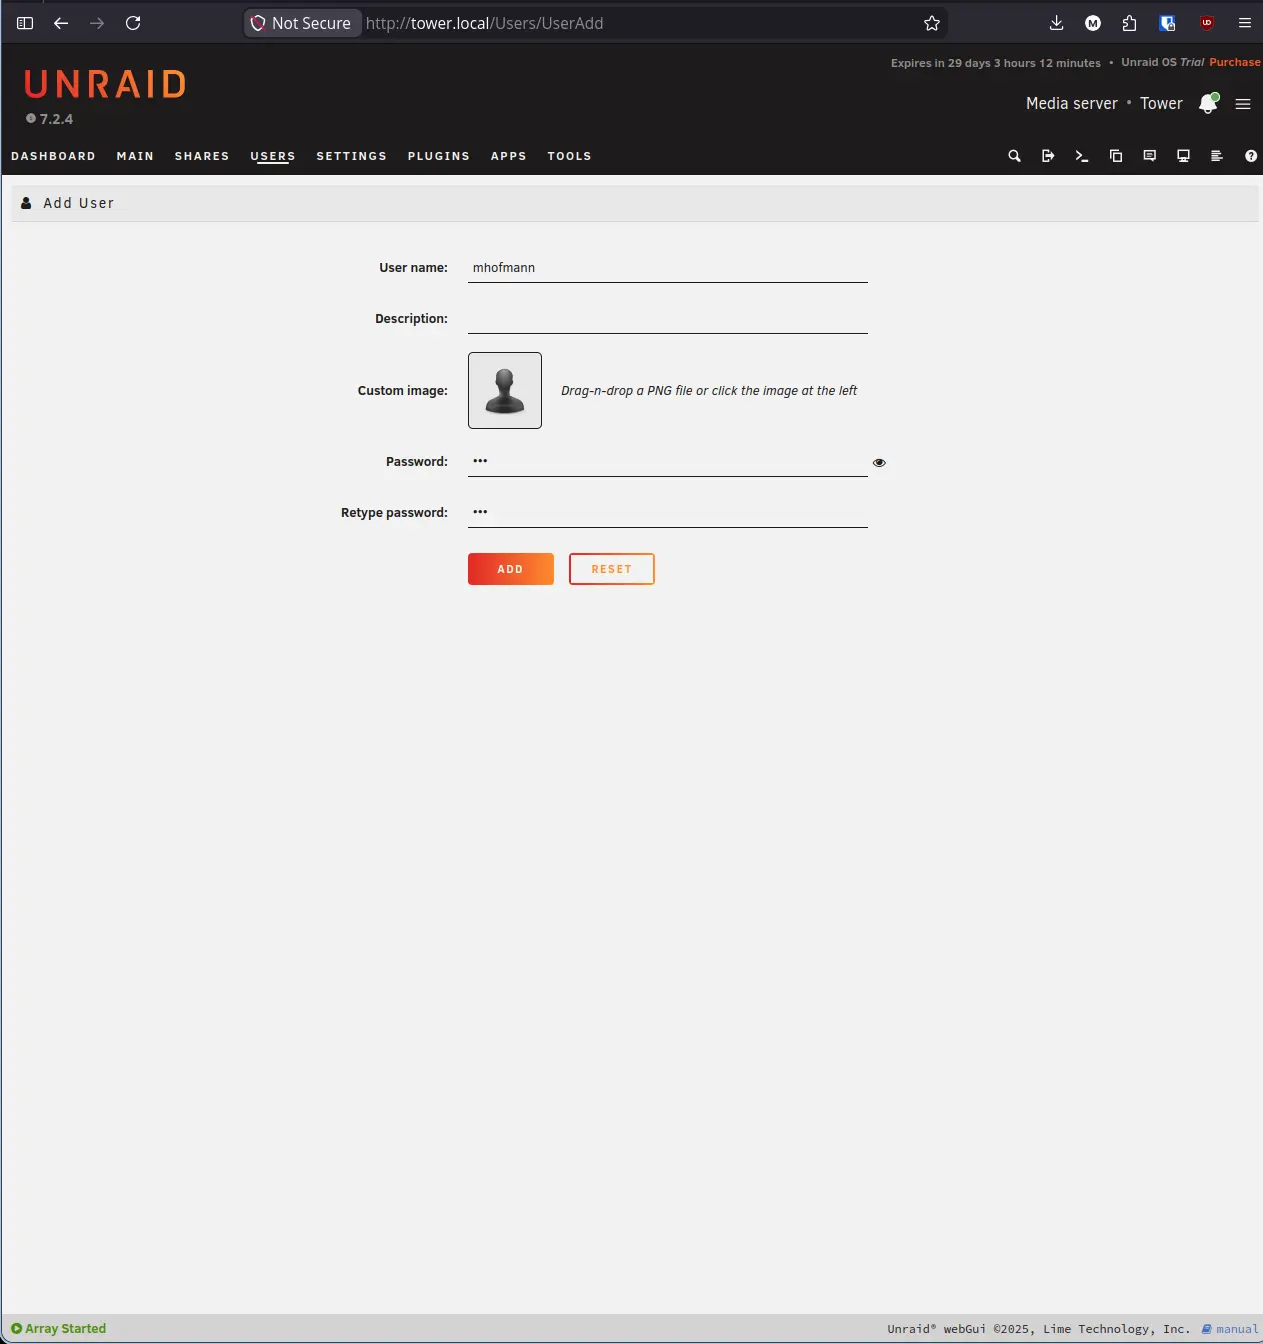
- Enter a username (e.g.
mhofmann). - Set a password and confirm it.
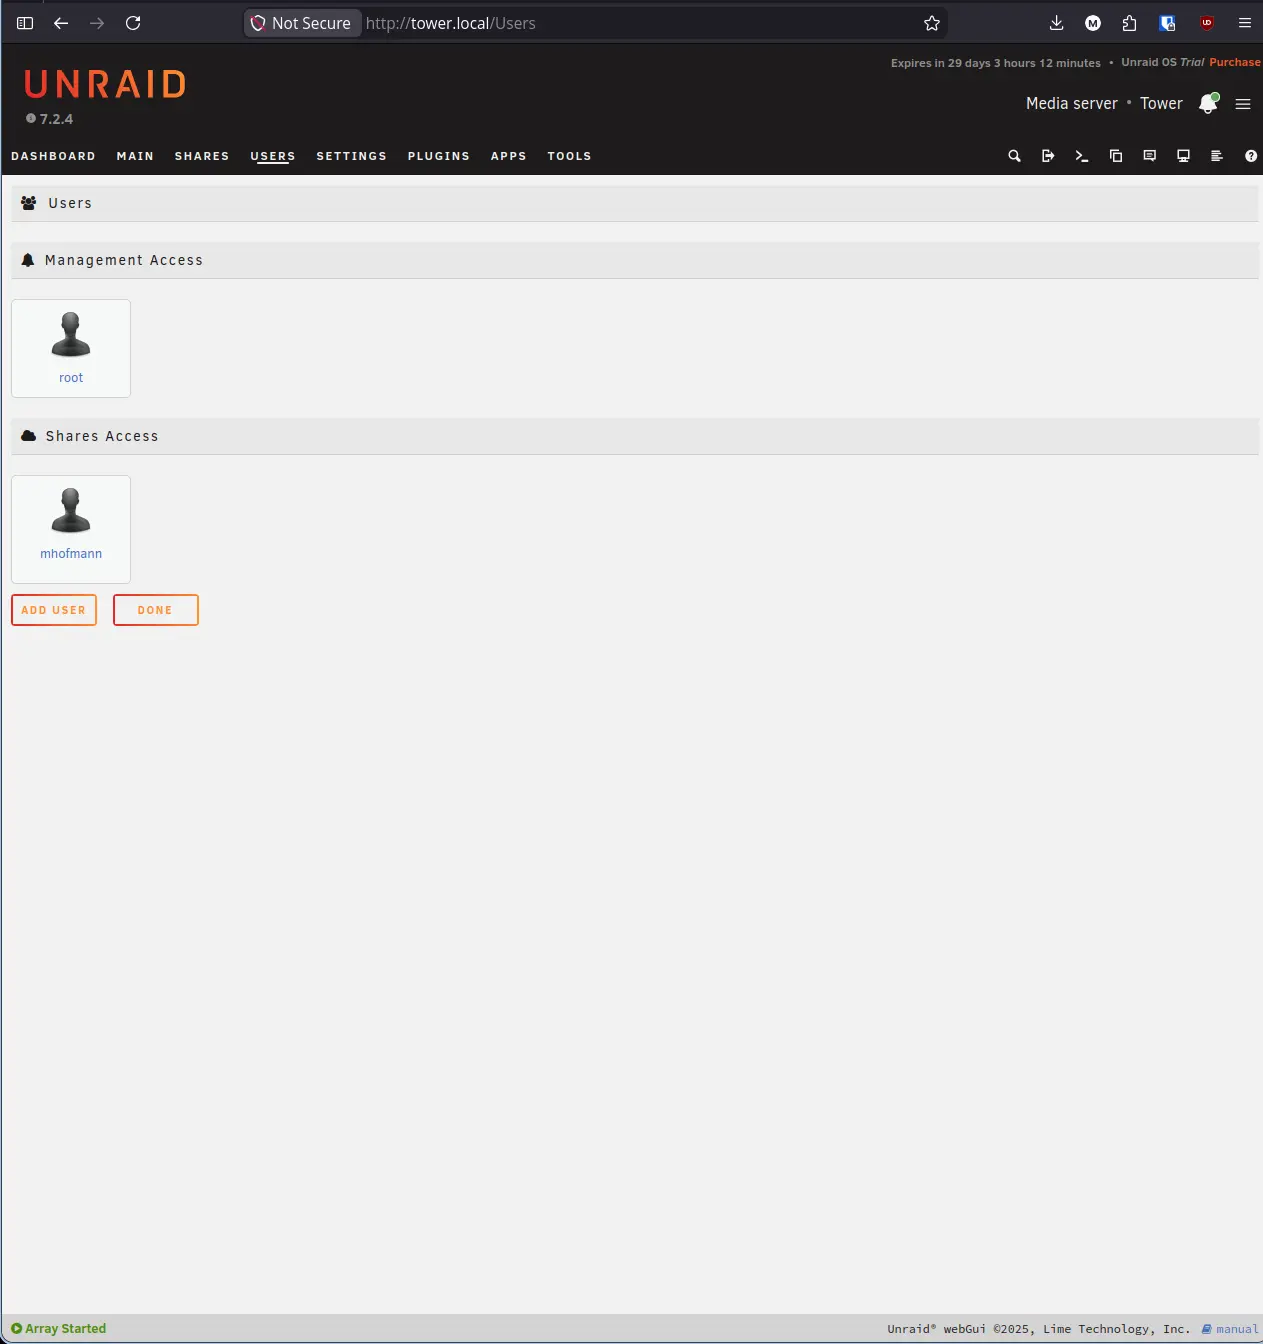
- Click Add, then click Done.
Lab Notes & Troubleshooting#
SSH connection refused. Make sure Use SSH is set to Yes in Settings > Management Access and that you clicked Apply. The SSH server does not start until Apply is clicked.
Permission denied (publickey). The public key may not have been saved correctly. Go back to Users > root, confirm the key is in the SSH authorized keys field, and click Save. Make sure you copied the full key including the ssh-ed25519 prefix.
Web UI is not asking for a password. Your browser may have cached the session from before the password was set. Close the browser completely and reopen it, then navigate back to the Unraid IP.
SMB user cannot log into the web UI. This is expected. SMB users created through the Users tab have no web UI access. Only root can log into the web UI.
Summary#
Your Unraid server now has a secured root account, SSH access via key-based authentication, and a dedicated SMB user ready for share access. In the next guide we will create shares and assign permissions to the user we just created.
Next Step: Creating and Managing Shares on Unraid