This tutorial builds a professional-grade HVAC scheduler in Node-RED that handles seasonal changes, peak utility hours, occupancy, and guest overrides. It replaces rigid thermostat schedules with visual logic that actually follows your life.
Executive Summary#
Home Assistant is great for simple tasks, but HVAC logic often requires several checks at once. Node-RED lets you visualize all of that logic on a canvas so you can see exactly why a temperature was set. When something goes wrong, you can trace the message through the flow and spot the problem quickly instead of guessing.
The finished flow handles four things automatically:
- Time-of-Use windows that adjust setpoints during peak rate hours
- Seasonal switching between Winter and Summer logic based on the calendar month, with no manual input required
- Occupancy checks that stop the AC if the house is empty or on vacation
- Guest overrides that let guests change the temperature without the automation fighting them
Prerequisites#
| Component | Requirement |
|---|---|
| Platform | Home Assistant (OS or Supervised) |
| Add-on | Node-RED (available in the HA Add-on Store) |
| Device | Any climate entity (Nest, Ecobee, Z-Wave, etc.) |
| Helpers | Two toggles: Guest Mode and Thermostat Schedule Enabled |
Implementation#
Step 1: Download the Flow#
You can import the finished flow directly into Node-RED instead of building it from scratch.
Download srp_tou_full_schedule.json
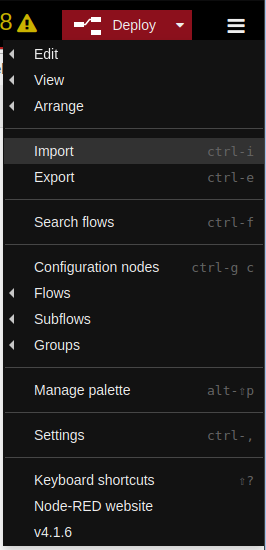
To import it, click the hamburger menu in the top right corner of Node-RED and select Import:
Paste the JSON or click “select a file to import” and choose the downloaded file. Make sure new flow is selected at the bottom so it lands on its own tab:
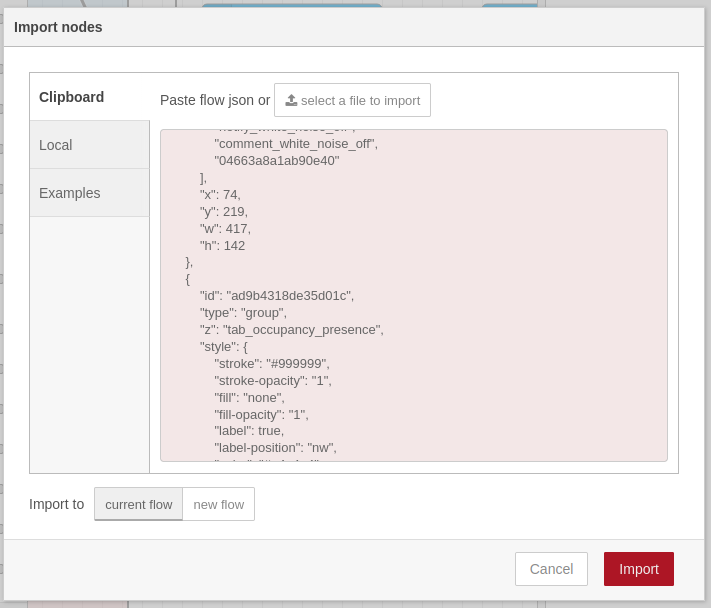
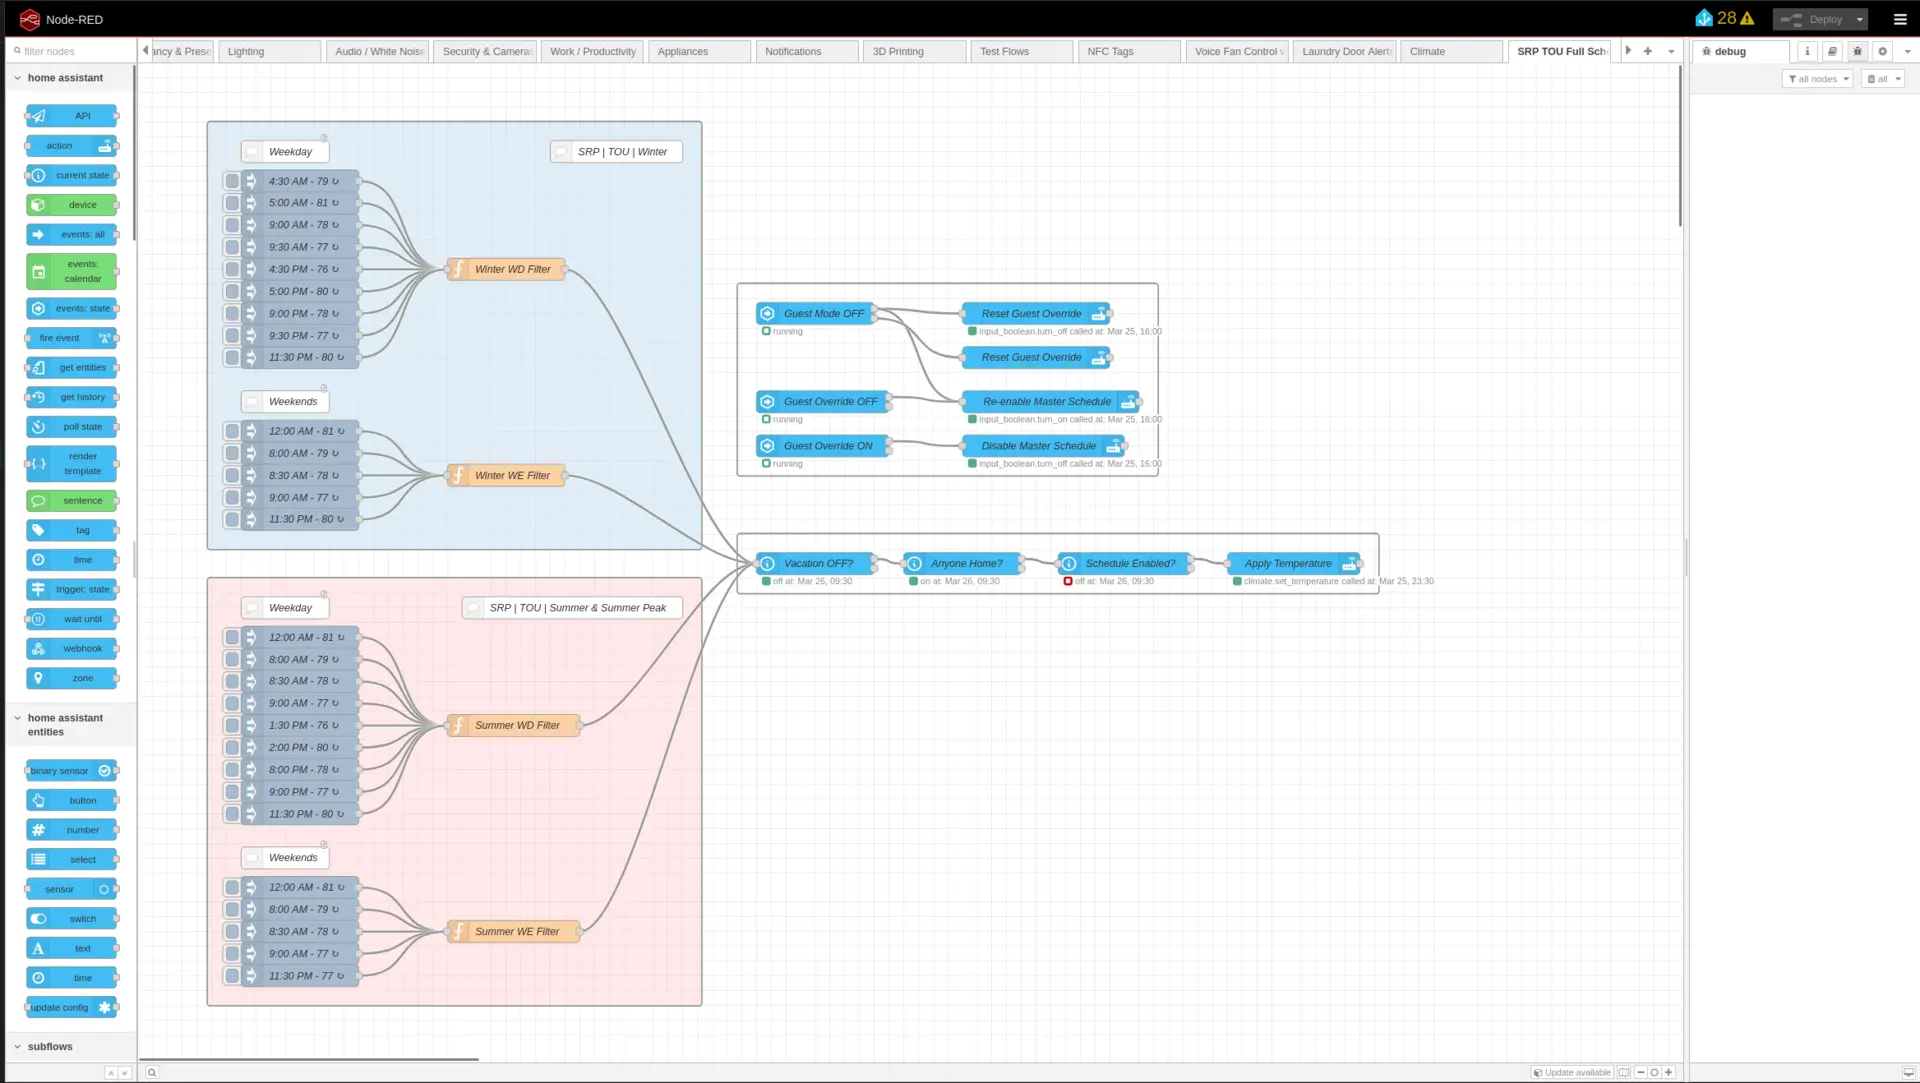
The flow will land as a new tab called SRP TOU Full Schedule. You will still need to update the entity IDs to match your own setup. The steps below walk you through exactly what each part does and what to change.
Here is the big picture. The flow has four distinct sections:
Step 2: Create Your Helpers#
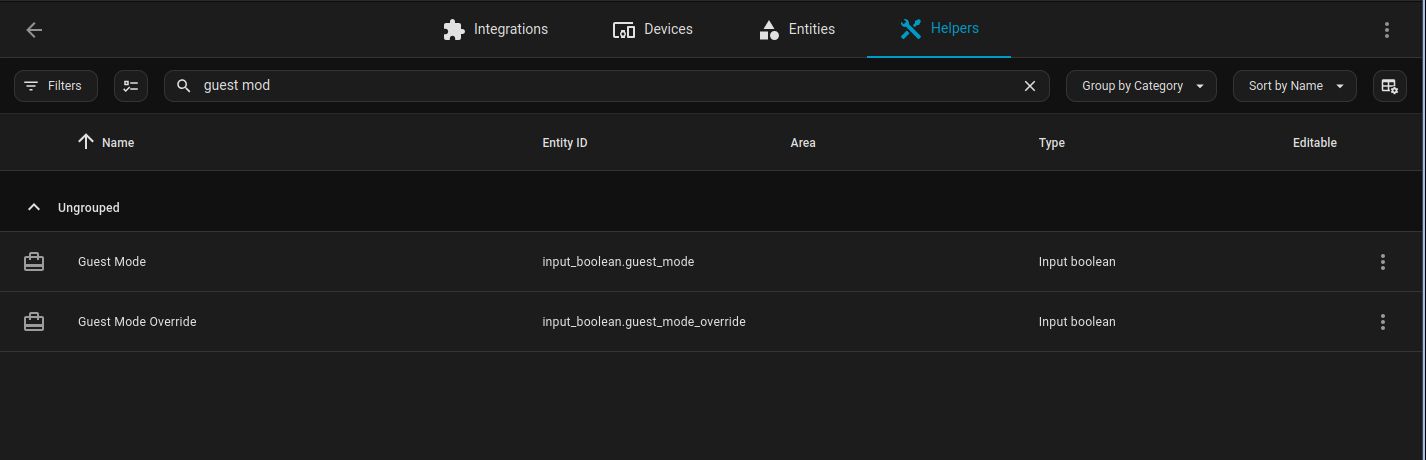
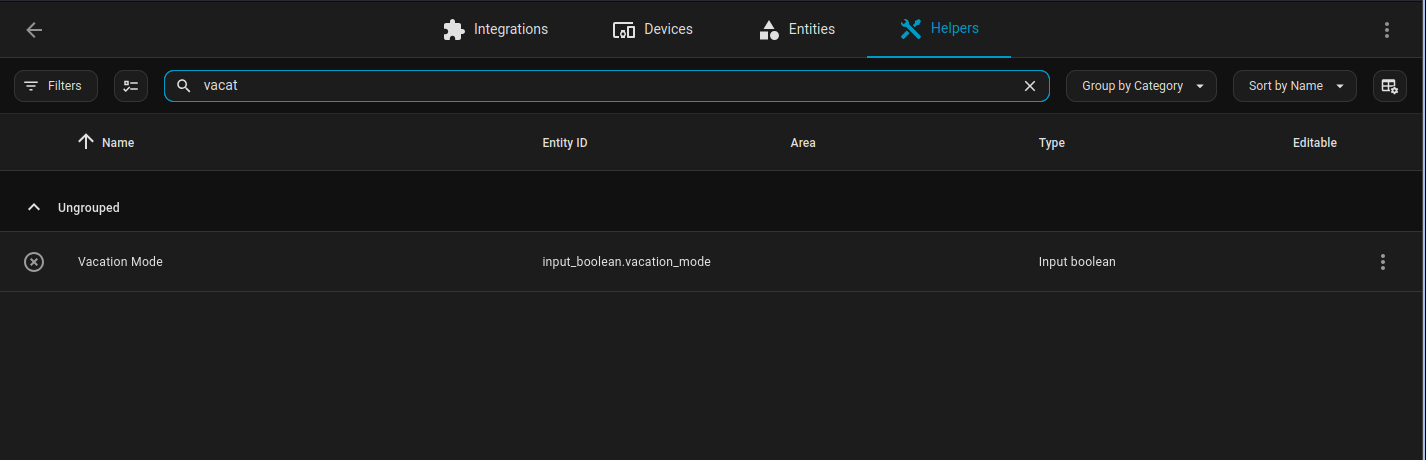
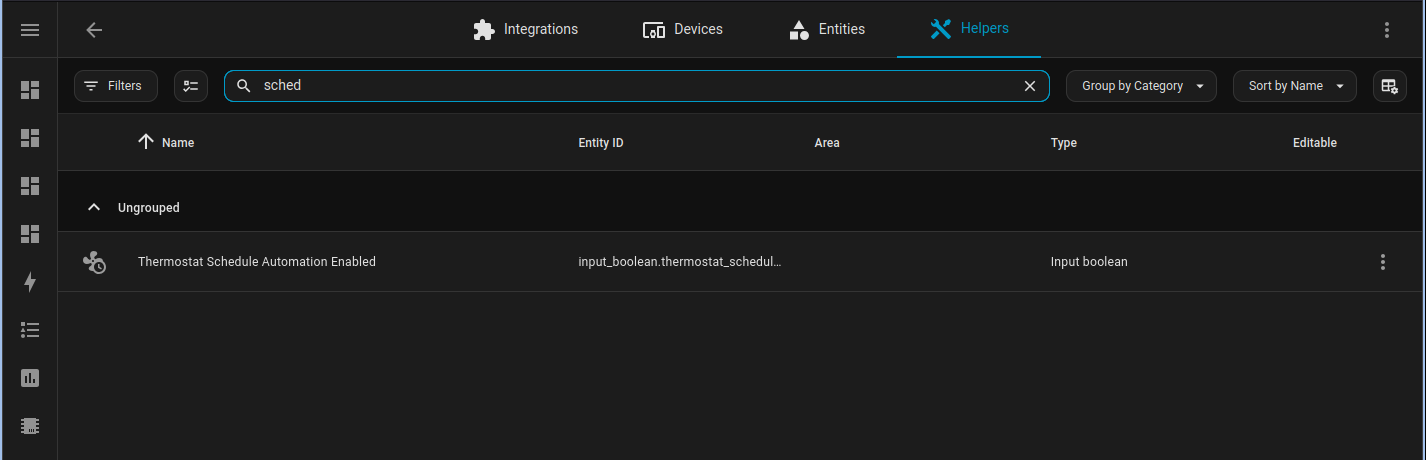
Helpers are small virtual switches that Node-RED reads to understand the current state of your home. In Home Assistant, go to Settings > Devices & Services > Helpers.
You need two Toggle helpers:
input_boolean.guest_mode— when this is on, the guest override logic fires and pauses the main scheduleinput_boolean.thermostat_schedule_automation_enabled— the master on/off switch for the entire flow
You do not need a Season dropdown. The flow determines the season automatically by reading the current month from the system clock.
Step 3: Set Up the Time Triggers#
Each schedule transition is driven by an Inject node set to fire at a specific time of day. The number in the node name is the temperature setpoint passed along as the message payload.
- Drag an Inject Node onto the canvas
- Set the payload type to Number
- Enter the target temperature as the value (for example,
76) - Set the repeat mode to at a specific time and enter the trigger time
- Name the node to match, such as
1:30 PM - 76
The finished Summer Weekday schedule looks like this:
| Time | Setpoint | Reason |
|---|---|---|
| 12:00 AM | 81°F | Overnight economy |
| 8:00 AM | 79°F | Morning warmup |
| 8:30 AM | 78°F | Ramp down |
| 9:00 AM | 77°F | Comfortable day |
| 1:30 PM | 76°F | Pre-cool before peak |
| 2:00 PM | 80°F | Load shed during peak |
| 8:00 PM | 78°F | Post-peak recovery |
| 9:00 PM | 77°F | Evening comfort |
| 11:30 PM | 80°F | Late night economy |
Step 4: Build the Season and Day Filters#
Each group of time triggers connects to a Function node that checks two things at once: what month it is, and whether today is a weekday or a weekend. There are four filter functions in total.
Summer Weekday Filter:
const d = new Date();
const m = d.getMonth();
const day = d.getDay();
if ((m >= 4 && m <= 9) && (day >= 1 && day <= 5)) return msg;
return null;
Summer Weekend Filter:
const d = new Date();
const m = d.getMonth();
const day = d.getDay();
if ((m >= 4 && m <= 9) && (day === 0 || day === 6)) return msg;
return null;
Winter Weekday Filter:
const d = new Date();
const m = d.getMonth();
const day = d.getDay();
if ((m <= 3 || m >= 10) && (day >= 1 && day <= 5)) return msg;
return null;
Winter Weekend Filter:
const d = new Date();
const m = d.getMonth();
const day = d.getDay();
if ((m <= 3 || m >= 10) && (day === 0 || day === 6)) return msg;
return null;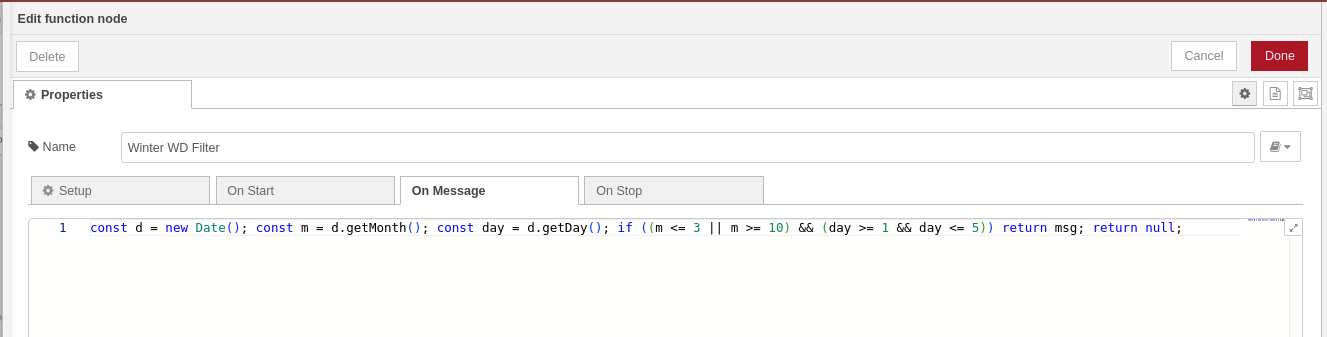
getMonth() returns 0 for January through 11 for December. getDay() returns 0 for Sunday through 6 for Saturday. Month 4 is May and month 9 is September, covering the Arizona summer peak season. If the current date does not match a filter’s conditions, the function returns null and the message stops there.
Step 5: Build the Safety Stack#
Every message from every filter funnels into the same three-node Safety Stack before anything reaches the thermostat. Think of these as doors that must all be unlocked in order.
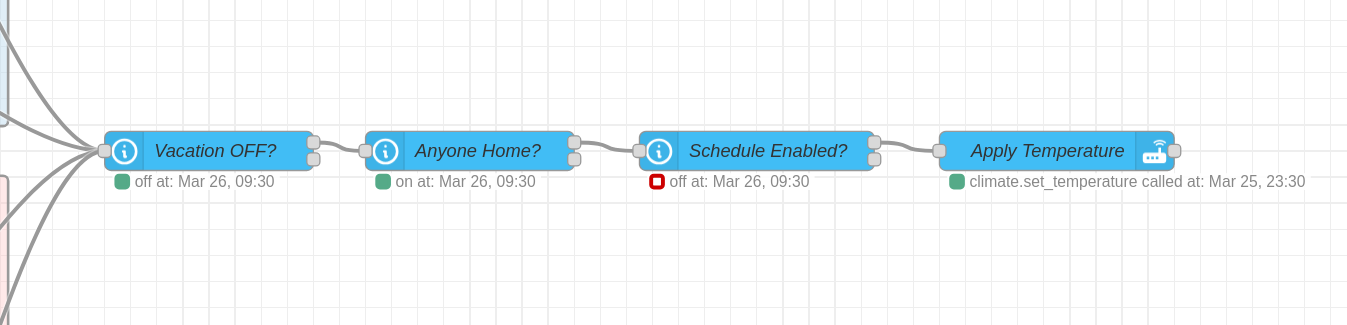
- Door 1: Vacation OFF? Reads
input_boolean.vacation_mode. If vacation mode is on, the message is dropped. - Door 2: Anyone Home? Reads
binary_sensor.home_occupied. If the house is empty, the message is dropped. - Door 3: Schedule Enabled? Reads
input_boolean.thermostat_schedule_automation_enabled. If a guest has taken manual control and flipped this off, the message stops here.
Only a message that passes all three checks reaches the final node.
Step 6: Wire Up the Apply Temperature Node#
Once all three doors are open, the message reaches the Apply Temperature action node. This is the only node that actually talks to your thermostat.
- Drag out a Call Service node
- Set the Domain to
climateand the Service toset_temperature - Select your thermostat entity
- In the Data field, enter:
{ "temperature": {{payload}} }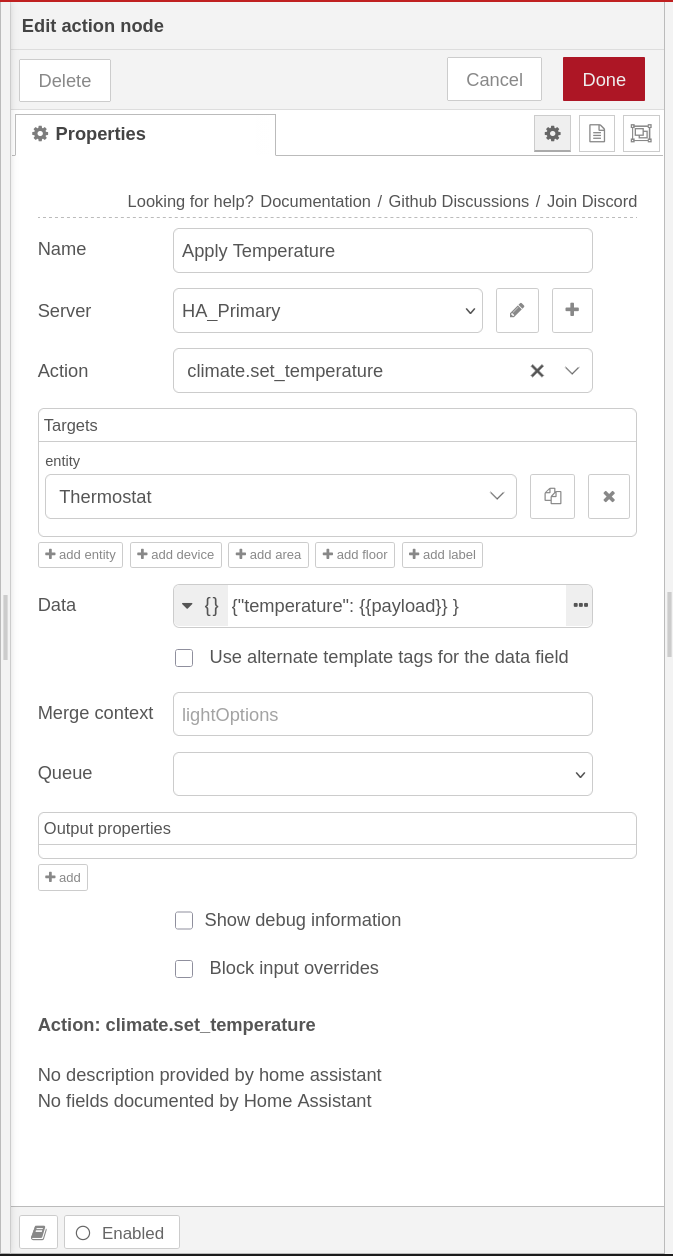
{{payload}} value is whatever number the Inject node sent.
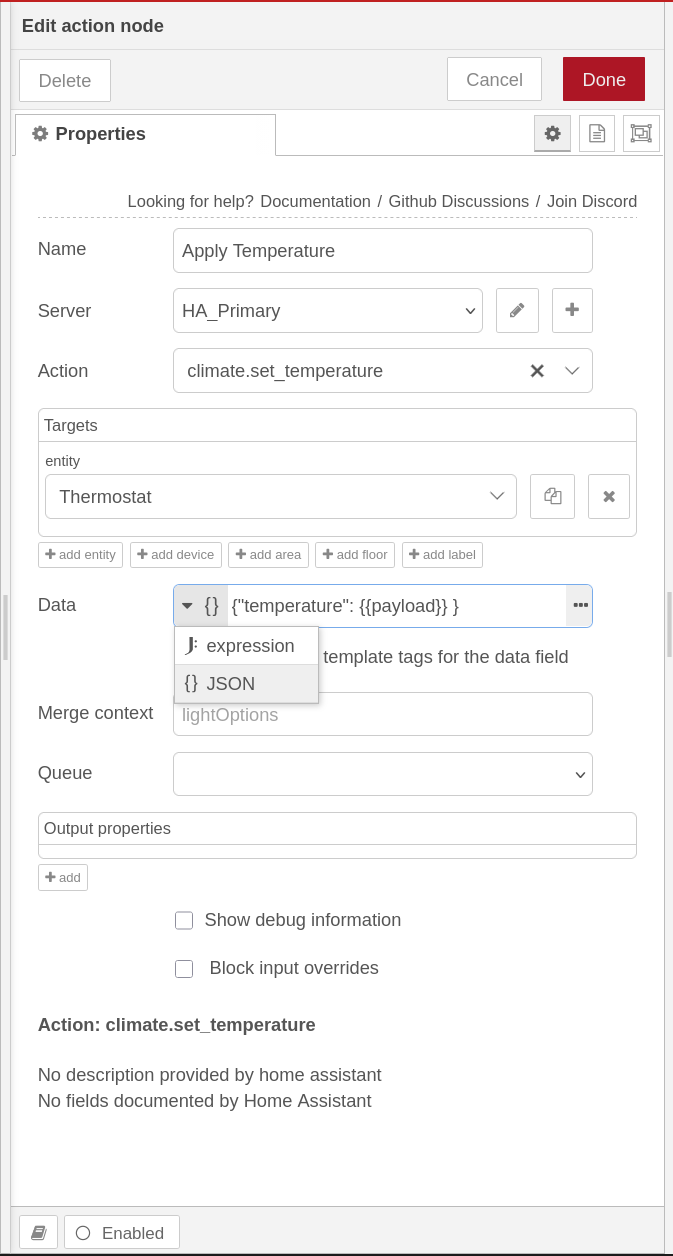
{{payload}} the same way.
Step 7: Configure Guest Override Logic#
The Guest Override group runs independently of the main schedule. It watches for state changes on input_boolean.guest_mode and input_boolean.guest_mode_override and manages the master schedule toggle automatically.
| Event | Action |
|---|---|
| Guest Mode turns OFF | Reset Guest Override, re-enable Master Schedule |
| Guest Override turns OFF | Re-enable Master Schedule |
| Guest Override turns ON | Disable Master Schedule |
When a guest manually adjusts the thermostat and triggers the override, the master schedule is paused so the automation does not undo their change at the next trigger. When Guest Mode is turned off, everything resets automatically.
Lab Notes & Troubleshooting#
The thermostat is not changing. Open the Debug panel in Node-RED and attach a Debug node after the Season Filter function. If messages are arriving at the filter but not passing through, check that your server’s system time and timezone are correct.
The schedule runs during vacation. The entity ID in the Current State node must match your helper exactly. Capitalization matters. Copy and paste the entity ID directly from Home Assistant to avoid typos.
The inject nodes did not fire. Standard Inject nodes trigger at an exact second. If your server was rebooting at that moment, the trigger may have been missed. Click the small button on the left side of any Inject node to fire it manually and test the flow without waiting.
Summary#
You now have a fully automated HVAC scheduler that handles season detection, peak rate windows, occupancy, and guest overrides without any manual intervention. The Safety Stack ensures the thermostat is never touched unless all conditions are met. Once the flow is stable, consider adding humidity offsets, window sensors, or dynamic pricing data to take it further.